Introduction
While the usual way to add threads to a 3D printing part is to use threaded inserts, another often overlooked option is nut embedding.
Inserts usually are the best option, but for onezies/twozies it can be annoying to have to buy and wait a whole bag of those to arrive, specially considering the average tinckerer most likely already has the perfectly sized nut in his collection.
In such cases, nut embedding is a good alternative, her how it works:
- Leave a pocket in the model for the nut (with appropriate tolerances).
- In the slicer, add a pause at the top of the pocket layer.
- During the print, when the pause is reached, manually insert the nut into the pocket.
- Resume the print and let the printer cover the nut.
How To Do It
Part Design - A Sacrifice To Bridge The Void
Designing the pocket is straightforward: measure your nut and create a pocket with appropriate clearance on each side (+0.5mm on the nut dimensions should do it).
In addition, I recommend adding one thin (~0.2mm) “sacrificial layer” directly into the model.
This sacrificial layer is here to ease bridging over the nut once the latter as been inserted. This layer will be punched through when screwing in the bolt for the first time.
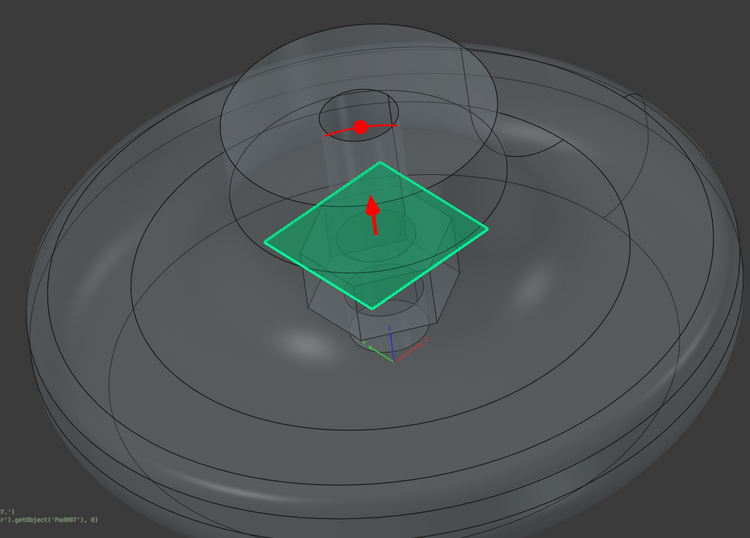
3D model with pocket and sacrificial layer
Some slicers fill-in closed cavities by default. No doubt there is an option somewhere to disable it, but instead of searching for it, an easy hack is to insert a really tiny (~1µm) hole in the sacrificial layer.
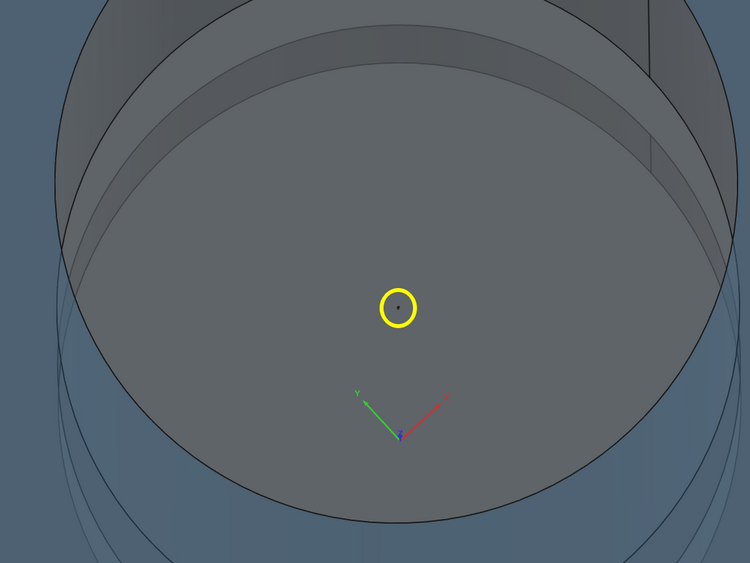
Add a tiny 1µm hole to prevent the slicer from filling the void
Here how it looks in 3D:
Loading 3D model...
3D knob model with embedding pocket
Slicing, Printing and Seasoning
Slicer
Once your model is ready, import it into your slicer, slice it, and add a PAUSE at the top of the nut pocket (the start of the sacrificial layer).
The process varies between slicers, but here’s how to do it in PrusaSlicer:
- Click
Slice now. - Using the vertical slider, navigate to the sacrificial layer.
- Right-click on the
+icon and selectAdd Pause. - Export the G-code.
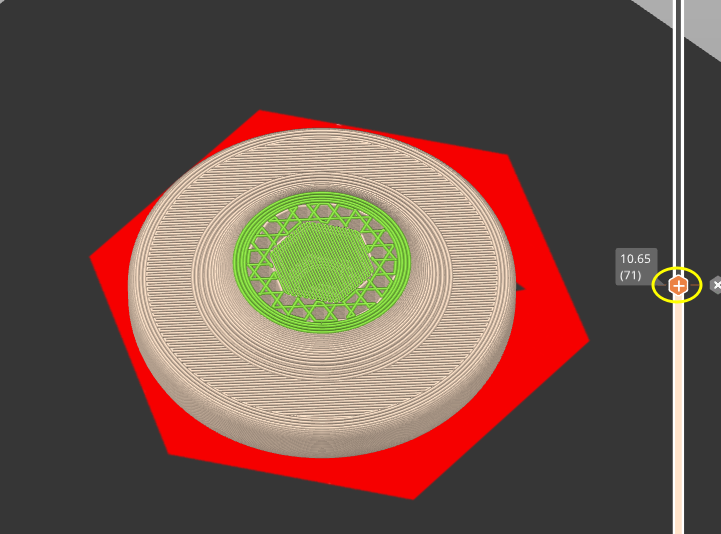
Adding a pause in PrusaSlicer
Note 1: The PAUSE occurs at the start of the selected layer. Don’t be confused by the default horizontal cursor position, which is set at the end of the layer.
Note 2: Make sure your toolhead moves out of the way, either through your printer’s PAUSE macro or by using G-code like:
M25                     ; pause SD print
G91                     ; switch to relative positioning
G1 X25 Y25 Z25 F3000    ; move nozzle +25mm in X, Y, and Z (away from print)
M0                      ; wait for user to press button / resume
G1 X-25 Y-25 Z-25 F3000 ; move nozzle back -25mm to original position
G90                     ; return to absolute positioning
M24                     ; resume SD print
Or, more simply, if your printer supports it:
M600 X25 Y25 Z25 ; "color change" without retraction.
Printing
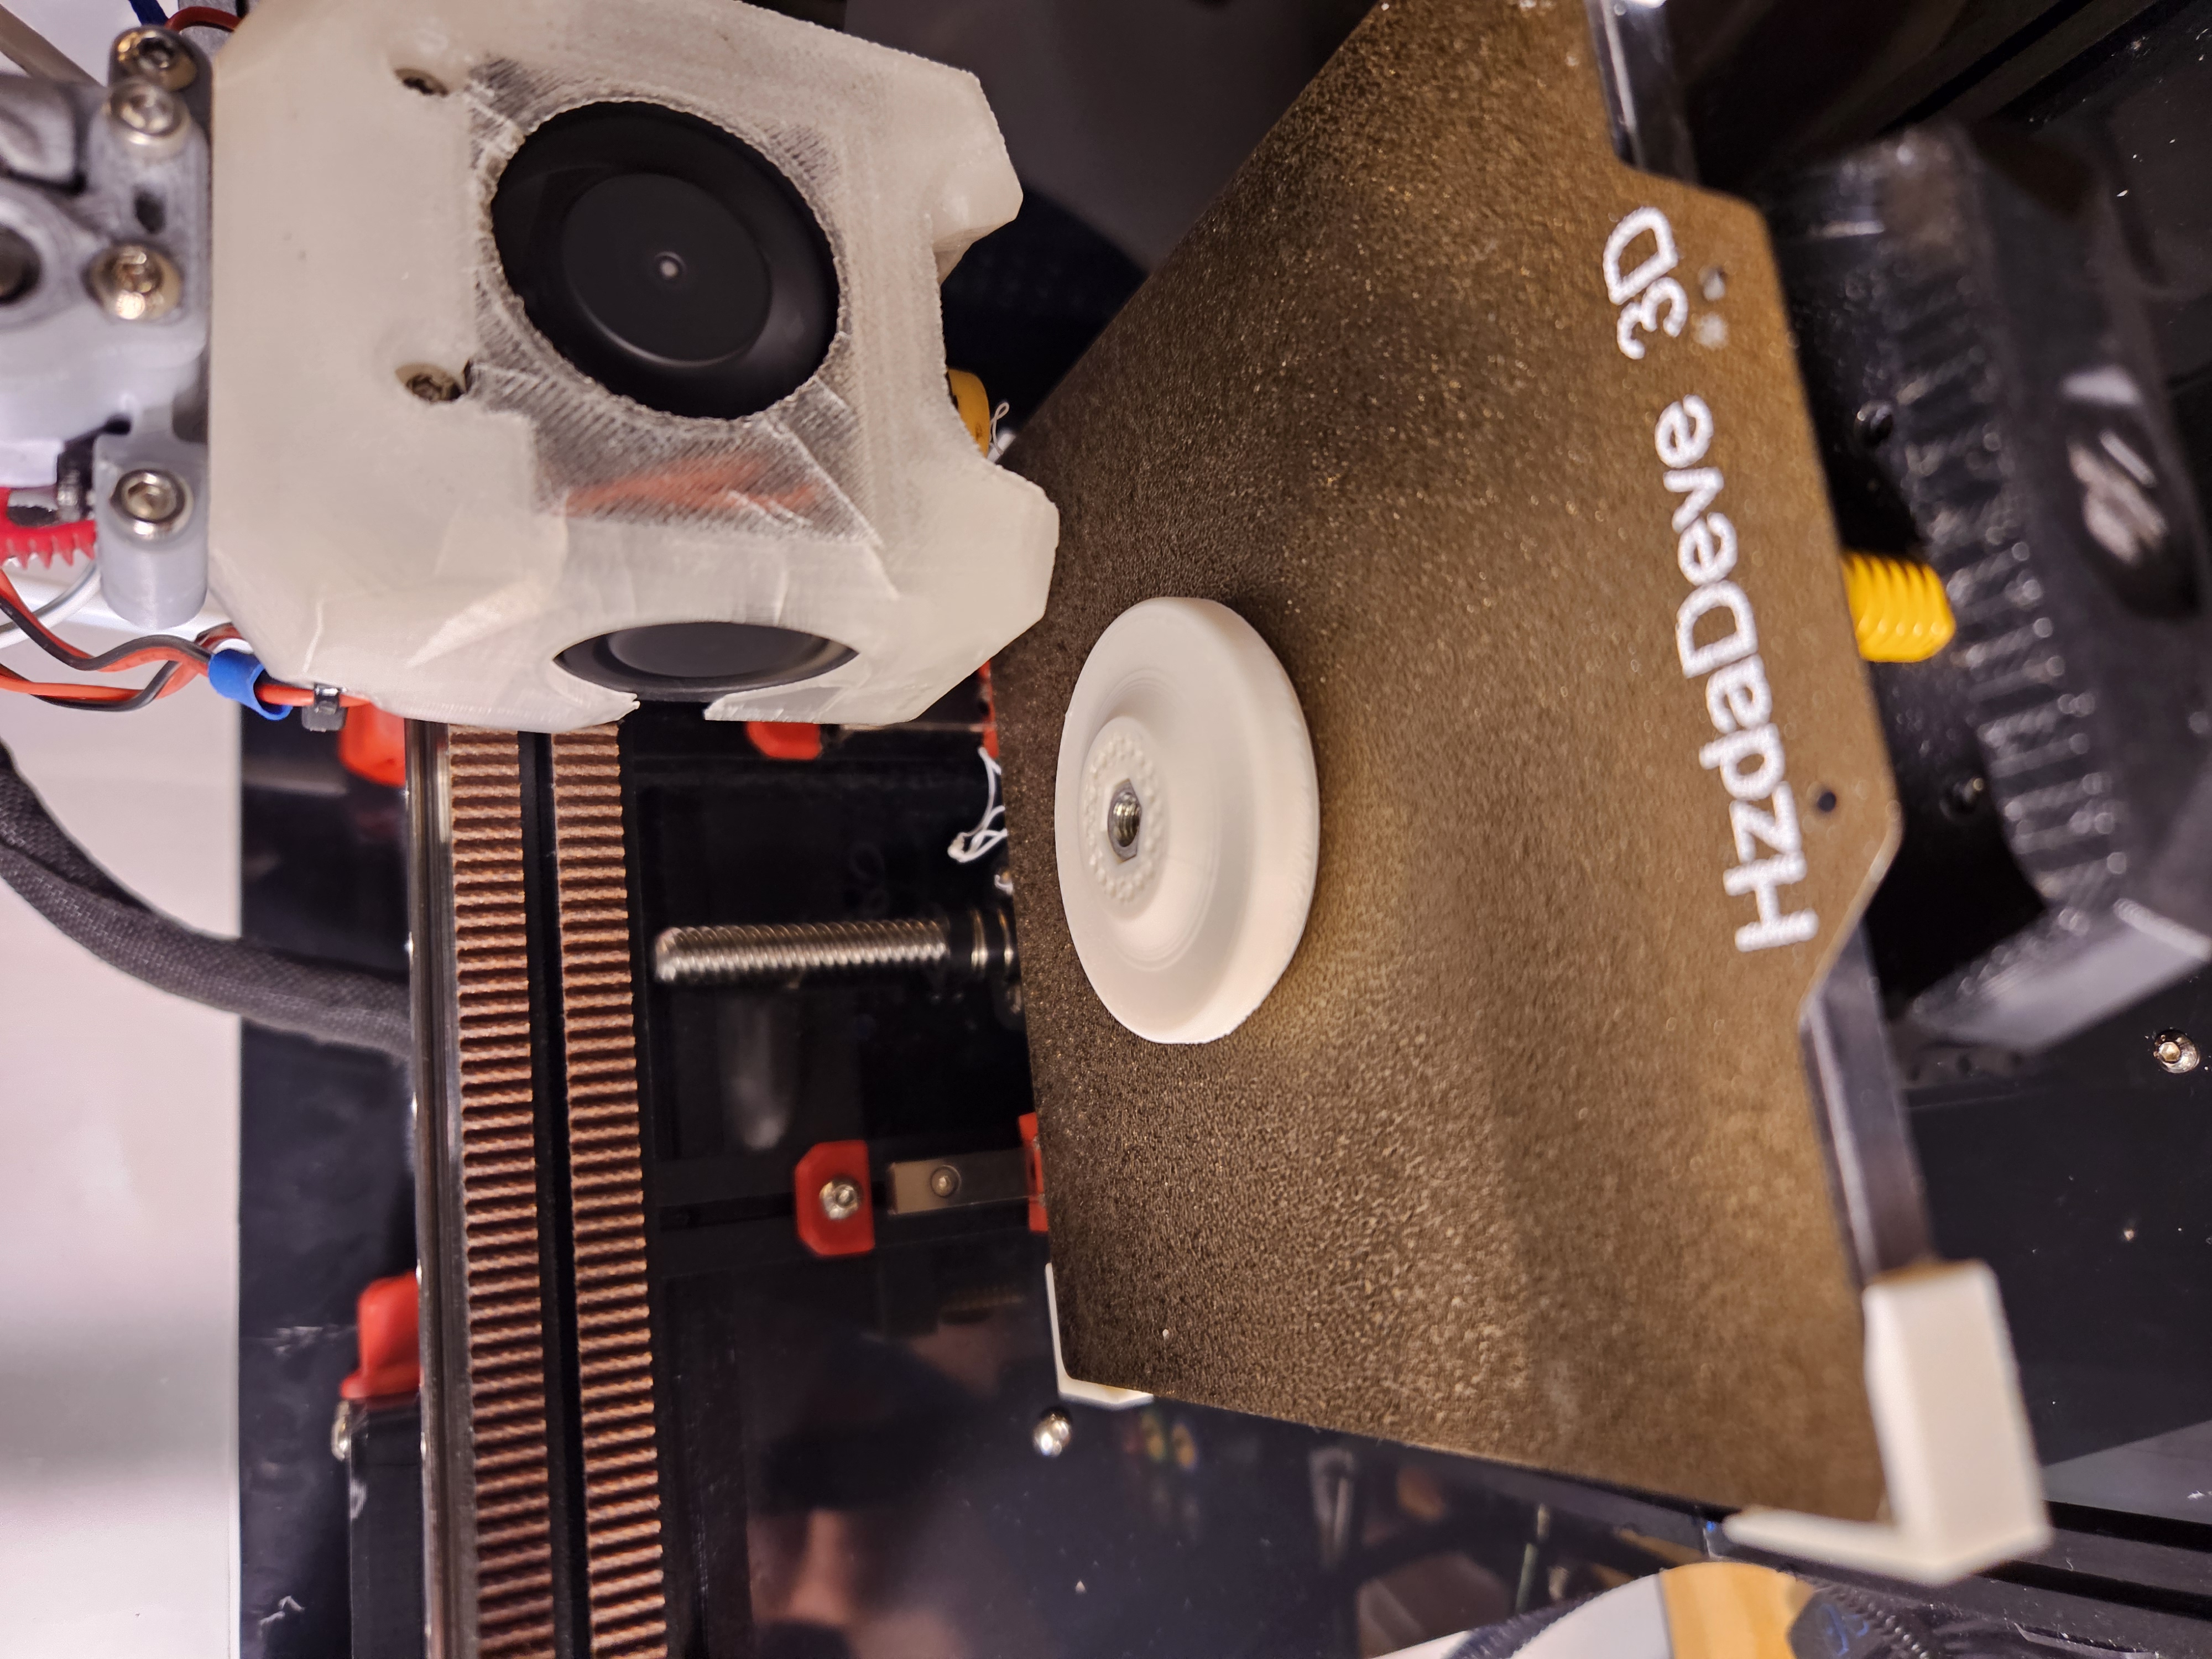
Once you have your G-code, start the print and wait.
When the PAUSE occurs, insert the nut carefully (be cautious not to detach the part from the build plate… don’t ask me how I know…).
Insert the nut during the pause
Then resume the print. The printer will add the sacrificial layer and bridge over the nut.
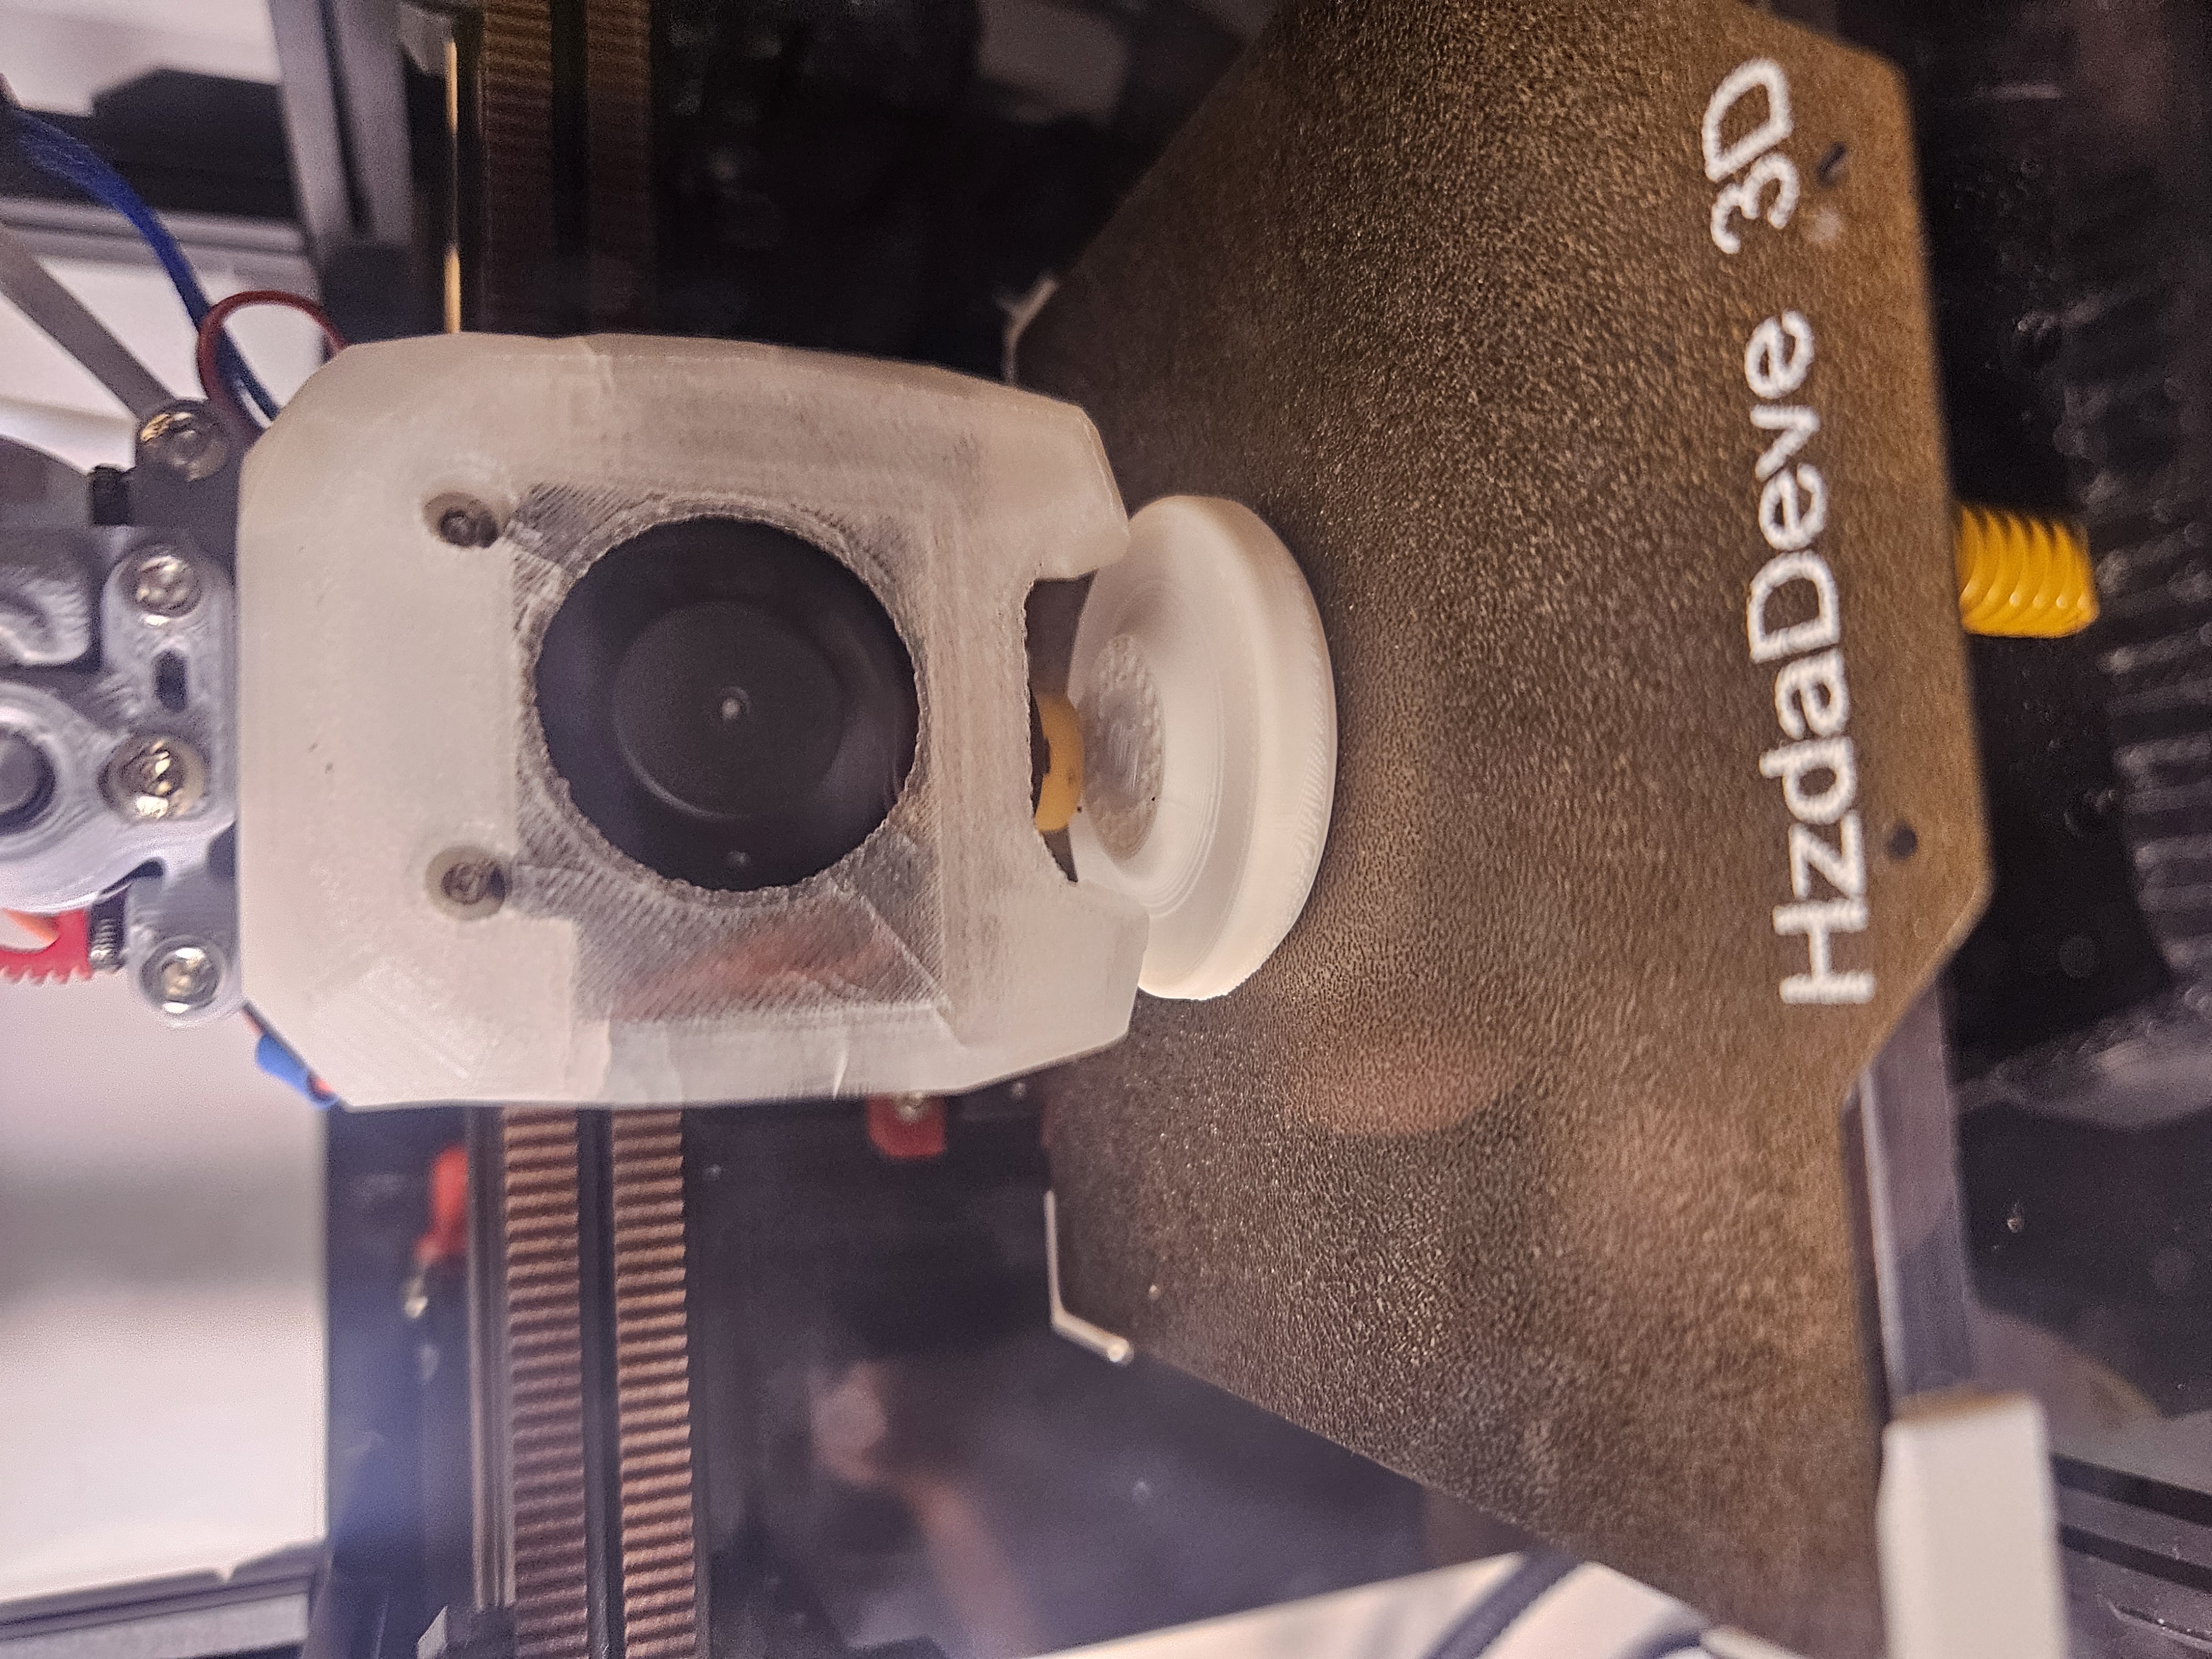
Sacrificial layer being printed over the nut
Let the print complete. If everything goes well, you’ll end up with a clean part and an invisible embedded nut.
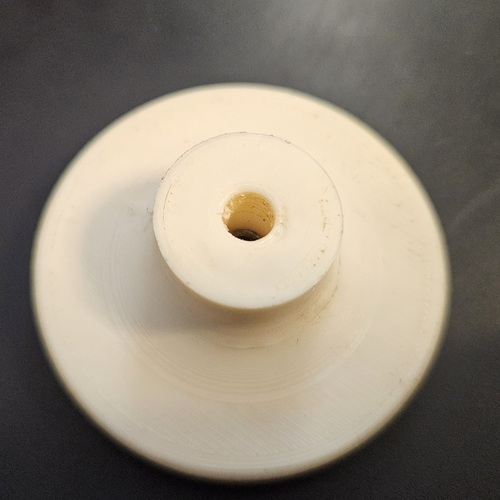
Finished part with embedded nut
Conclusion
Embedding nuts in prints is a useful technique that’s definitely handy in a pinch. It can even be marginally more resistant than inserts in some situation.
Plus, this technique isn’t limited to nuts. It can be leveraged in many other situations, such as adding mass to a part, inserting magnets, or adding rebar for reinforcement.
Hope you found this technique interesting, and happy printing.
Links
- Model’s link (FreeCAD)
- Marlin GCode Documentation
- CNC Kitchen’s insert testing article/video
- 3D Printing Nerd’s magnet embedding video